Getting Started
Opening the app
Pelorus Nav runs at pelorus-nav.com/app in any modern browser. For use on the water, install it:
- Phone/tablet browser — use your browser's "Add to Home Screen" / "Install app" option. The installed app runs full-screen and works offline.
- Android — install from the Play Store, or download the APK from the latest GitHub release.
- iOS — available through TestFlight (beta).
On first launch the app shows a navigation warning and user agreement, and asks for location permission the first time GPS is used. By default the chart opens on the built-in NOAA vector charts, streaming tiles as you pan — no setup needed while you're online.
The main screen
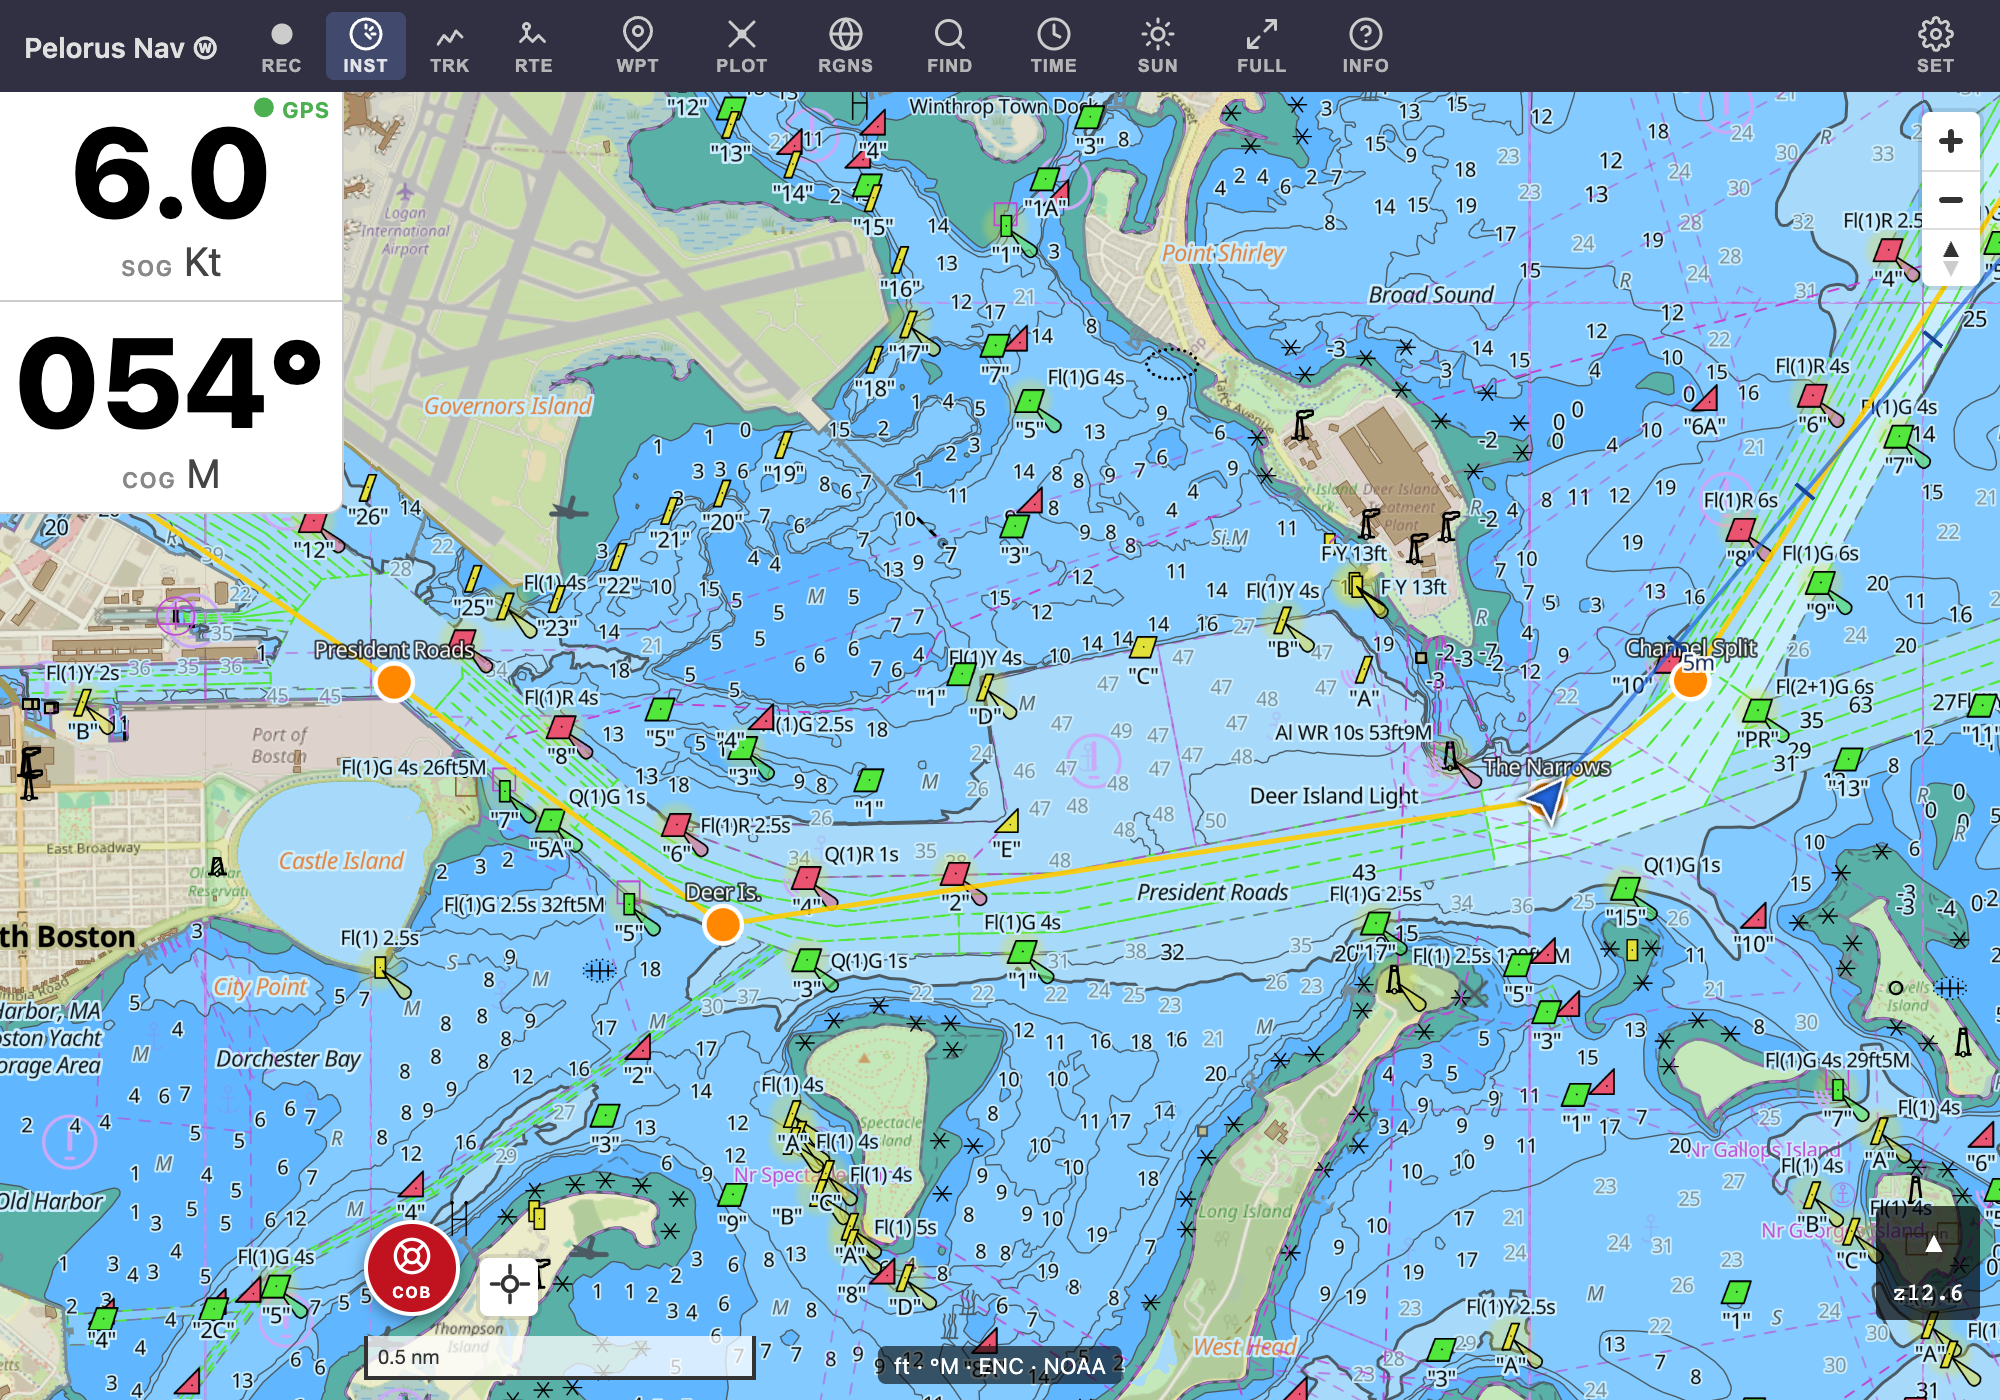
- Top bar — tools and panels: track recording (REC), instruments (INST), tracks (TRK), routes (RTE), and more under the ☰ menu on small screens. The gear (SET) opens Settings.
- Instruments (left) — big SOG/COG readouts, sized to be glanceable from the helm. The green dot shows GPS health; it turns into a NO GPS badge when the fix goes stale. Toggle the instrument panel with INST.
- Vessel — the blue arrow, with your course line projected ahead.
- COB button — crew-overboard: press and hold to drop a COB mark and start navigation back to it.
- Recenter button (next to COB) — locks the chart back onto the vessel and cycles the chart mode (see The Chart Display).
- Bottom badges — current depth/bearing units and chart source.
Settings worth changing
Open Settings (gear, top right). Most defaults are fine; these are the ones people change first, all on the Appearance tab:
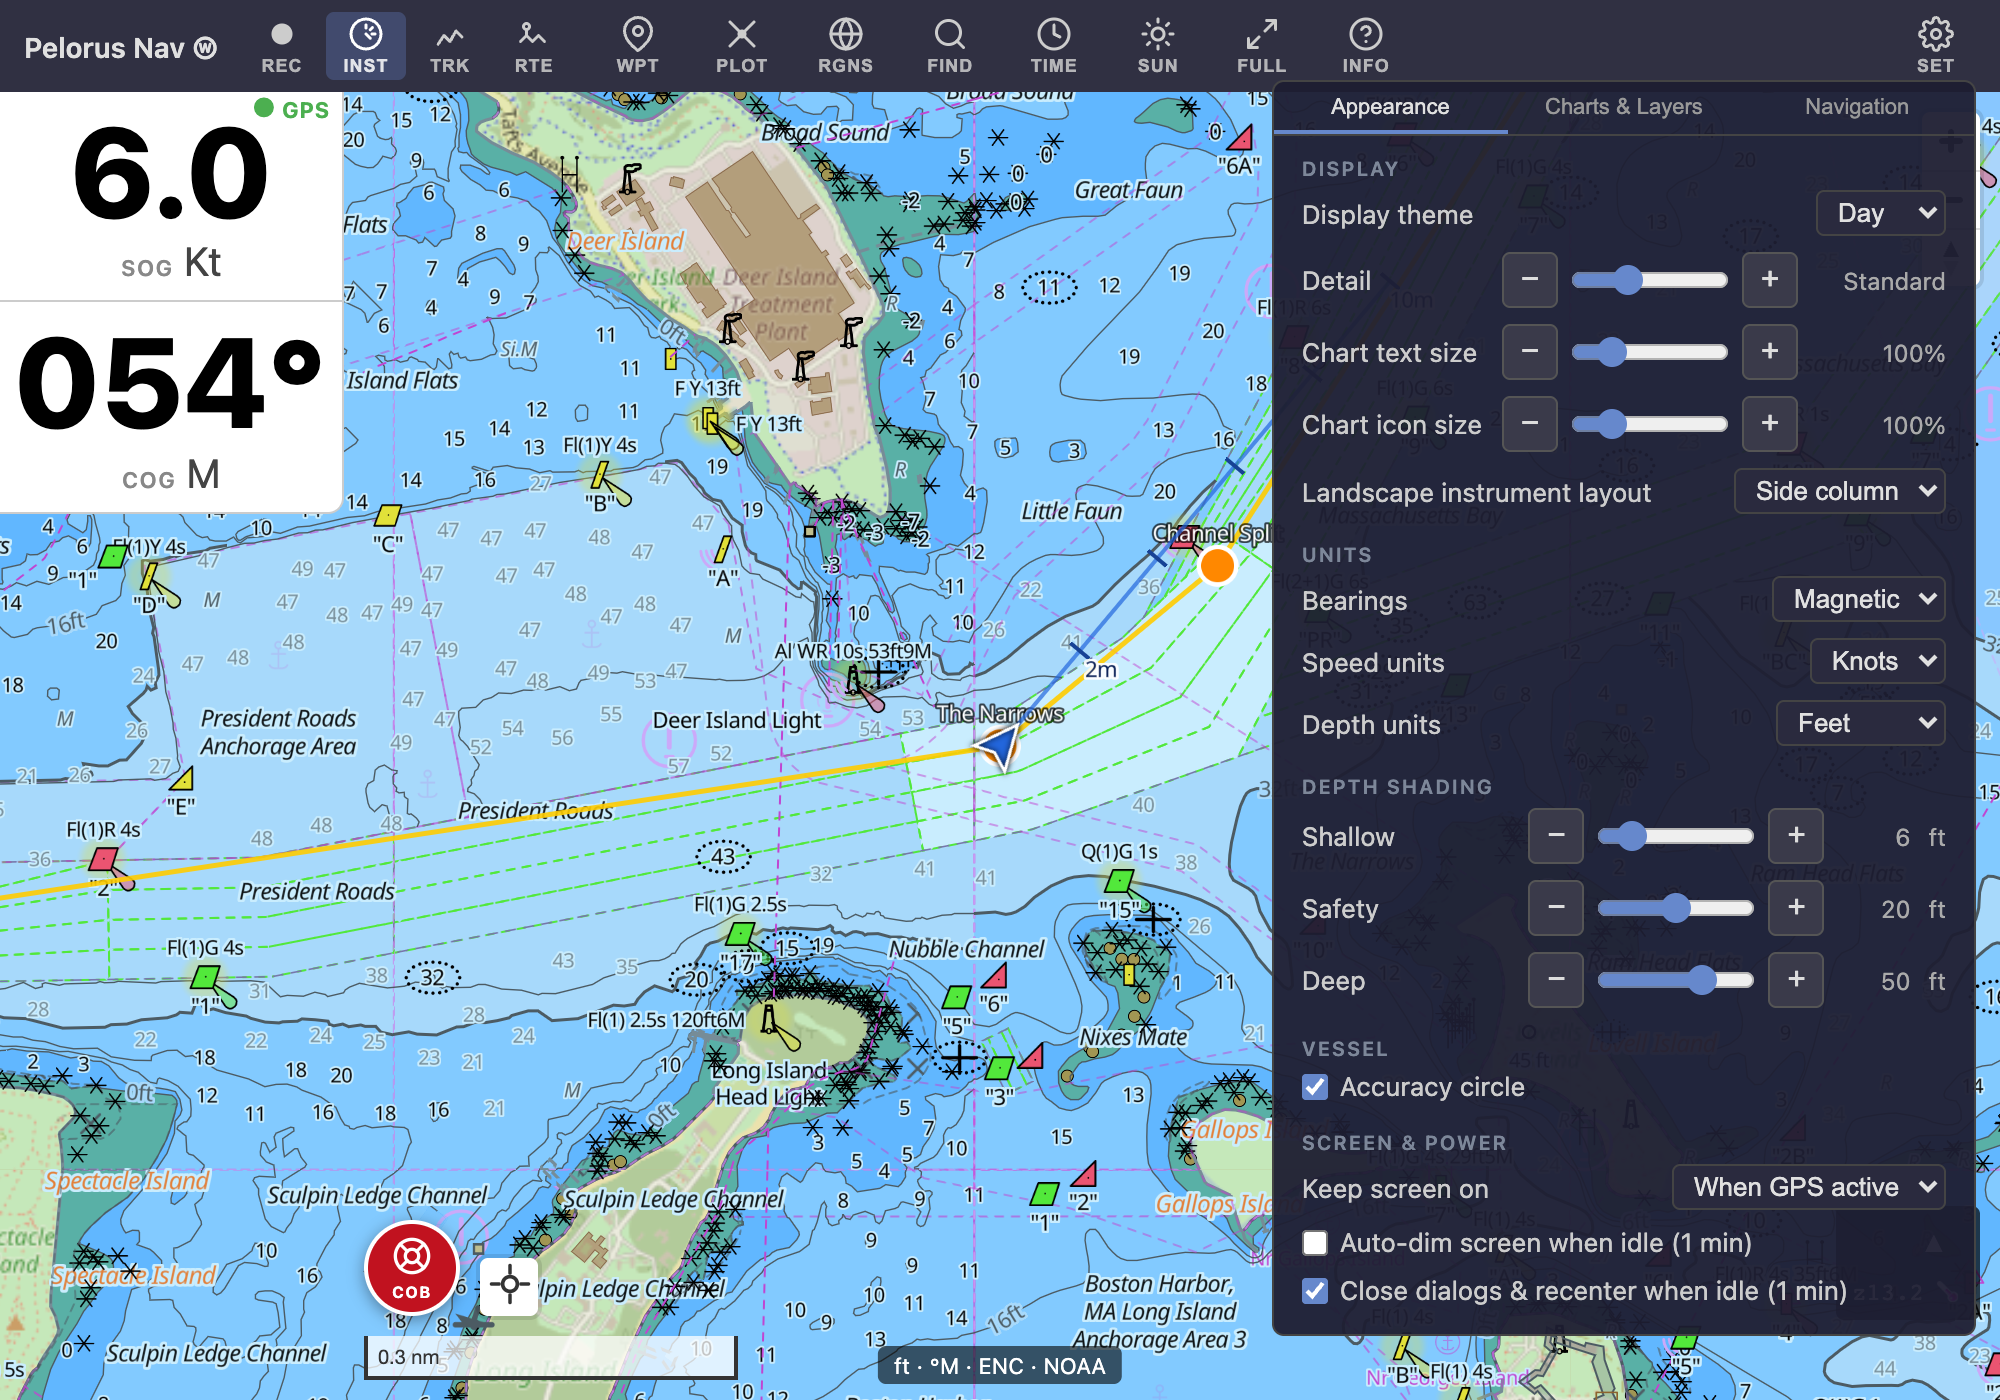
- Bearings — magnetic (default) or true. Affects every bearing the app shows, labeled
°Mor°Taccordingly. - Speed / depth units — knots, MPH, or km/h; feet (default), meters, or fathoms. Depth soundings on the chart follow this immediately.
- Display theme — Day, Dusk, Night, or E-ink. Night mode dims the whole chart to preserve night vision.
- Detail — how much chart detail is drawn; see detail levels.
- Chart text / icon size — scale up chart labels and symbols for readability at a distance.
- Waypoint size — scale waypoint and route markers up or down, including the handles shown while editing a route. Waypoint names keep the standard text size.
- Depth shading — the Shallow / Safety / Deep thresholds control the blue depth tinting. Set them for your boat — e.g. with a 6 ft draft you might use 8 ft shallow and 12 ft safety, so water you can't enter is obviously colored.
- Keep screen on — "When GPS active" keeps the display awake while you're underway.
- Screen lock & volume-key zoom (Android) — the volume keys zoom the chart, and Lock screen in the menu disables the touchscreen so spray and stray taps can't change anything under way; one volume press unlocks (so does holding a finger still on the screen for three seconds). Choosing Lock screen with this setting off offers to turn it on.
- Close dialogs & recenter when idle — after a minute of inactivity, open panels close and the chart snaps back to your vessel. That's what you want underway (the chart is always where your boat is when you glance at it), but it can be confusing while you're exploring the app at home — panels seem to close themselves. Feel free to turn it off while learning or planning, and back on aboard.
Try it from your couch
Settings → Navigation → GPS source includes a Simulator that sails a boat around Boston Harbor. It's the easiest way to explore navigation features — routes, instruments, tracks — before you're on the water.
Downloading charts for offline use
Streaming charts need an internet connection. Before heading out, download your region so charts live on the device: open Chart Regions (RGNS, under ☰ on small screens).
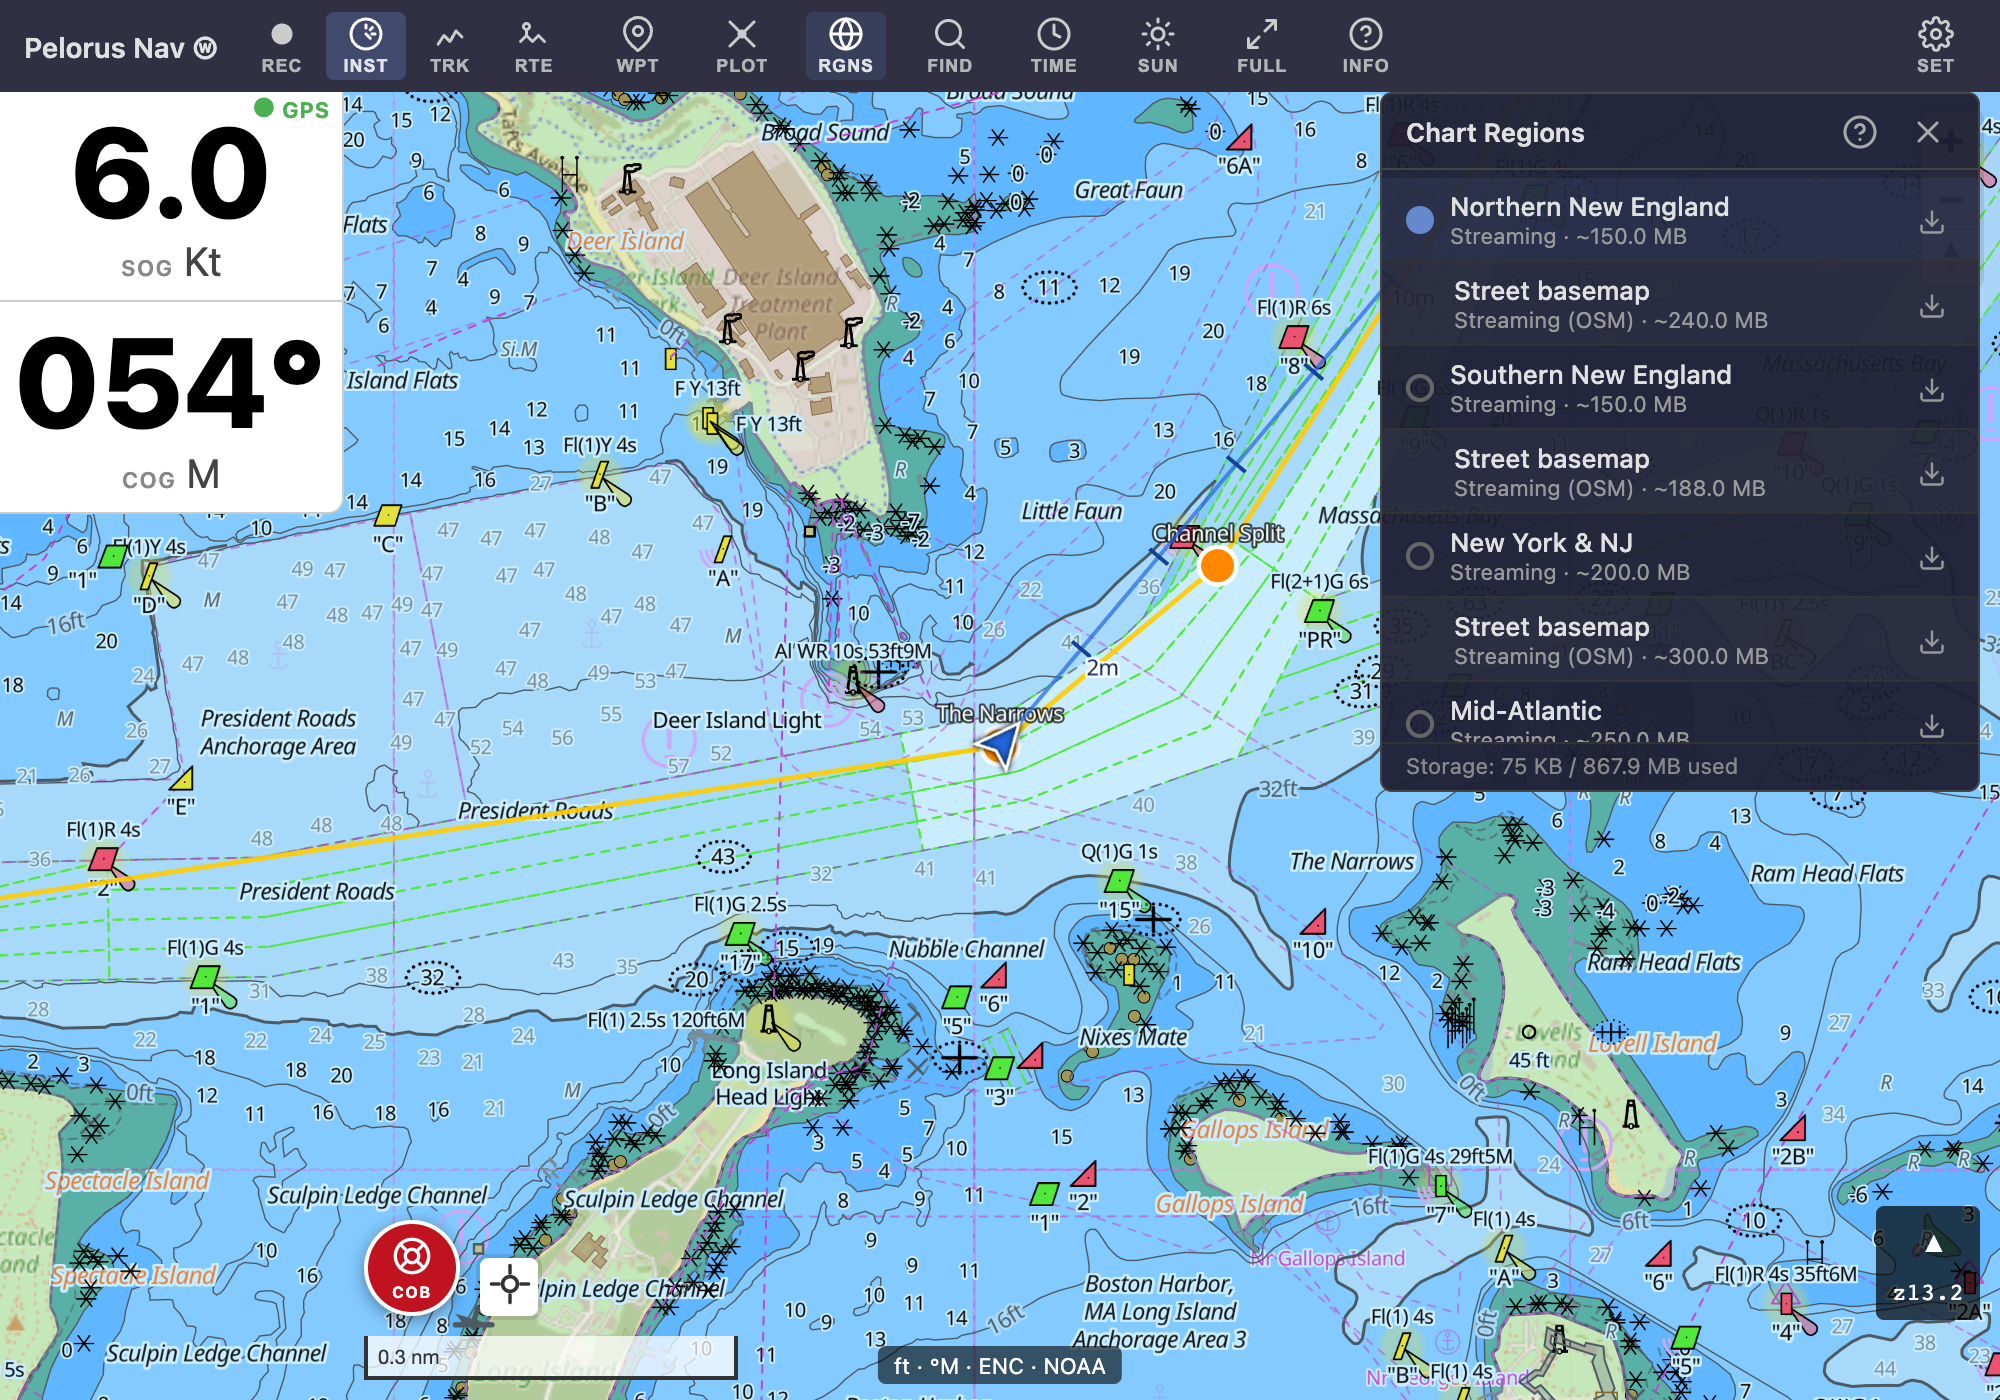
Each region covers a stretch of coast (Northern New England, Southern New England, New York & NJ, …) and shows its approximate download size. Tap the download button to store it; downloaded regions show a ✓ with their size and date. The radio button selects your active region — the one used for place-name search.
Most regions also offer an optional street basemap — an offline copy of the land map that otherwise streams from OpenStreetMap. Download it too if you want street-level land detail offshore; without it you still get the chart's own land areas.
When a chart update is published, downloaded regions show an Update available button — updating re-downloads only that region. The panel footer shows total storage used. Downloaded charts can be removed individually or all at once.
Save your home port
Worth doing on day one: make your slip or mooring a waypoint.
- Right-click / long-press your spot on the chart and choose Mark waypoint here.
- Open Waypoints (WPT) and tap the pencil on the new waypoint.
- Name it, pick the Anchorage icon (an anchor symbol on the chart), and add a note if you like — mooring number, harbormaster phone, whatever. Save.
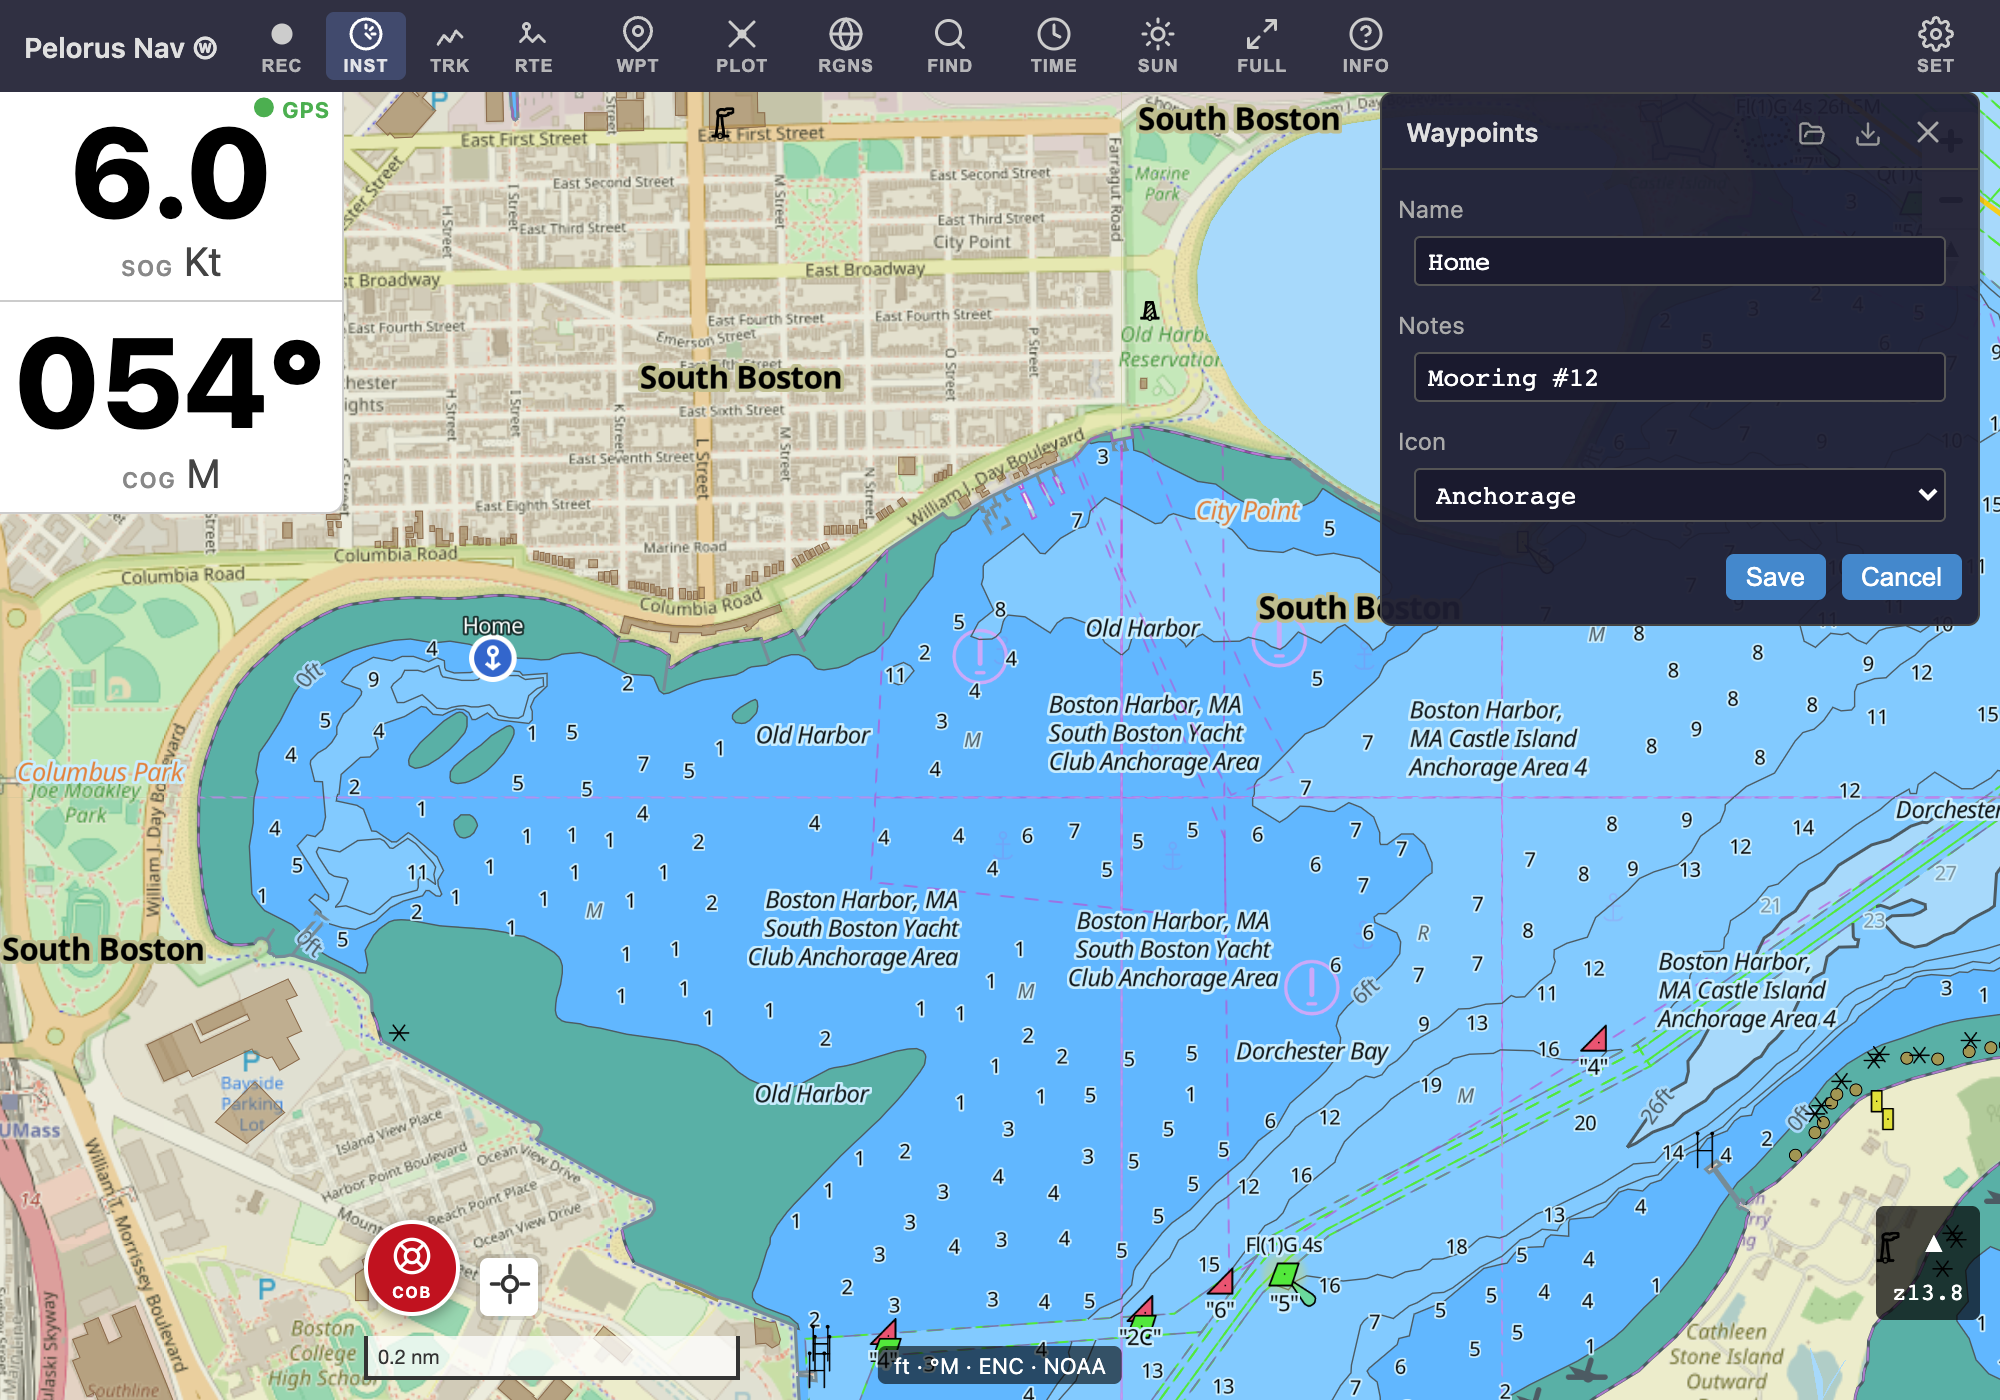
The icon sets the chart symbol — Anchorage, Hazard, Fuel, and POI are the other options. From now on, Navigate to on that waypoint gives you a live bearing and distance home from wherever you are — see Following a route for what the navigation instruments show.
Each waypoint row also has an eye to take it off the chart without deleting it, and waypoints can be put in folders and selected in bulk the same way routes can — worth knowing before you import a few hundred marks from another chartplotter.
Next steps
- The Chart Display — chart modes, layers, and detail levels.
- Routes — plan a route, then follow it.